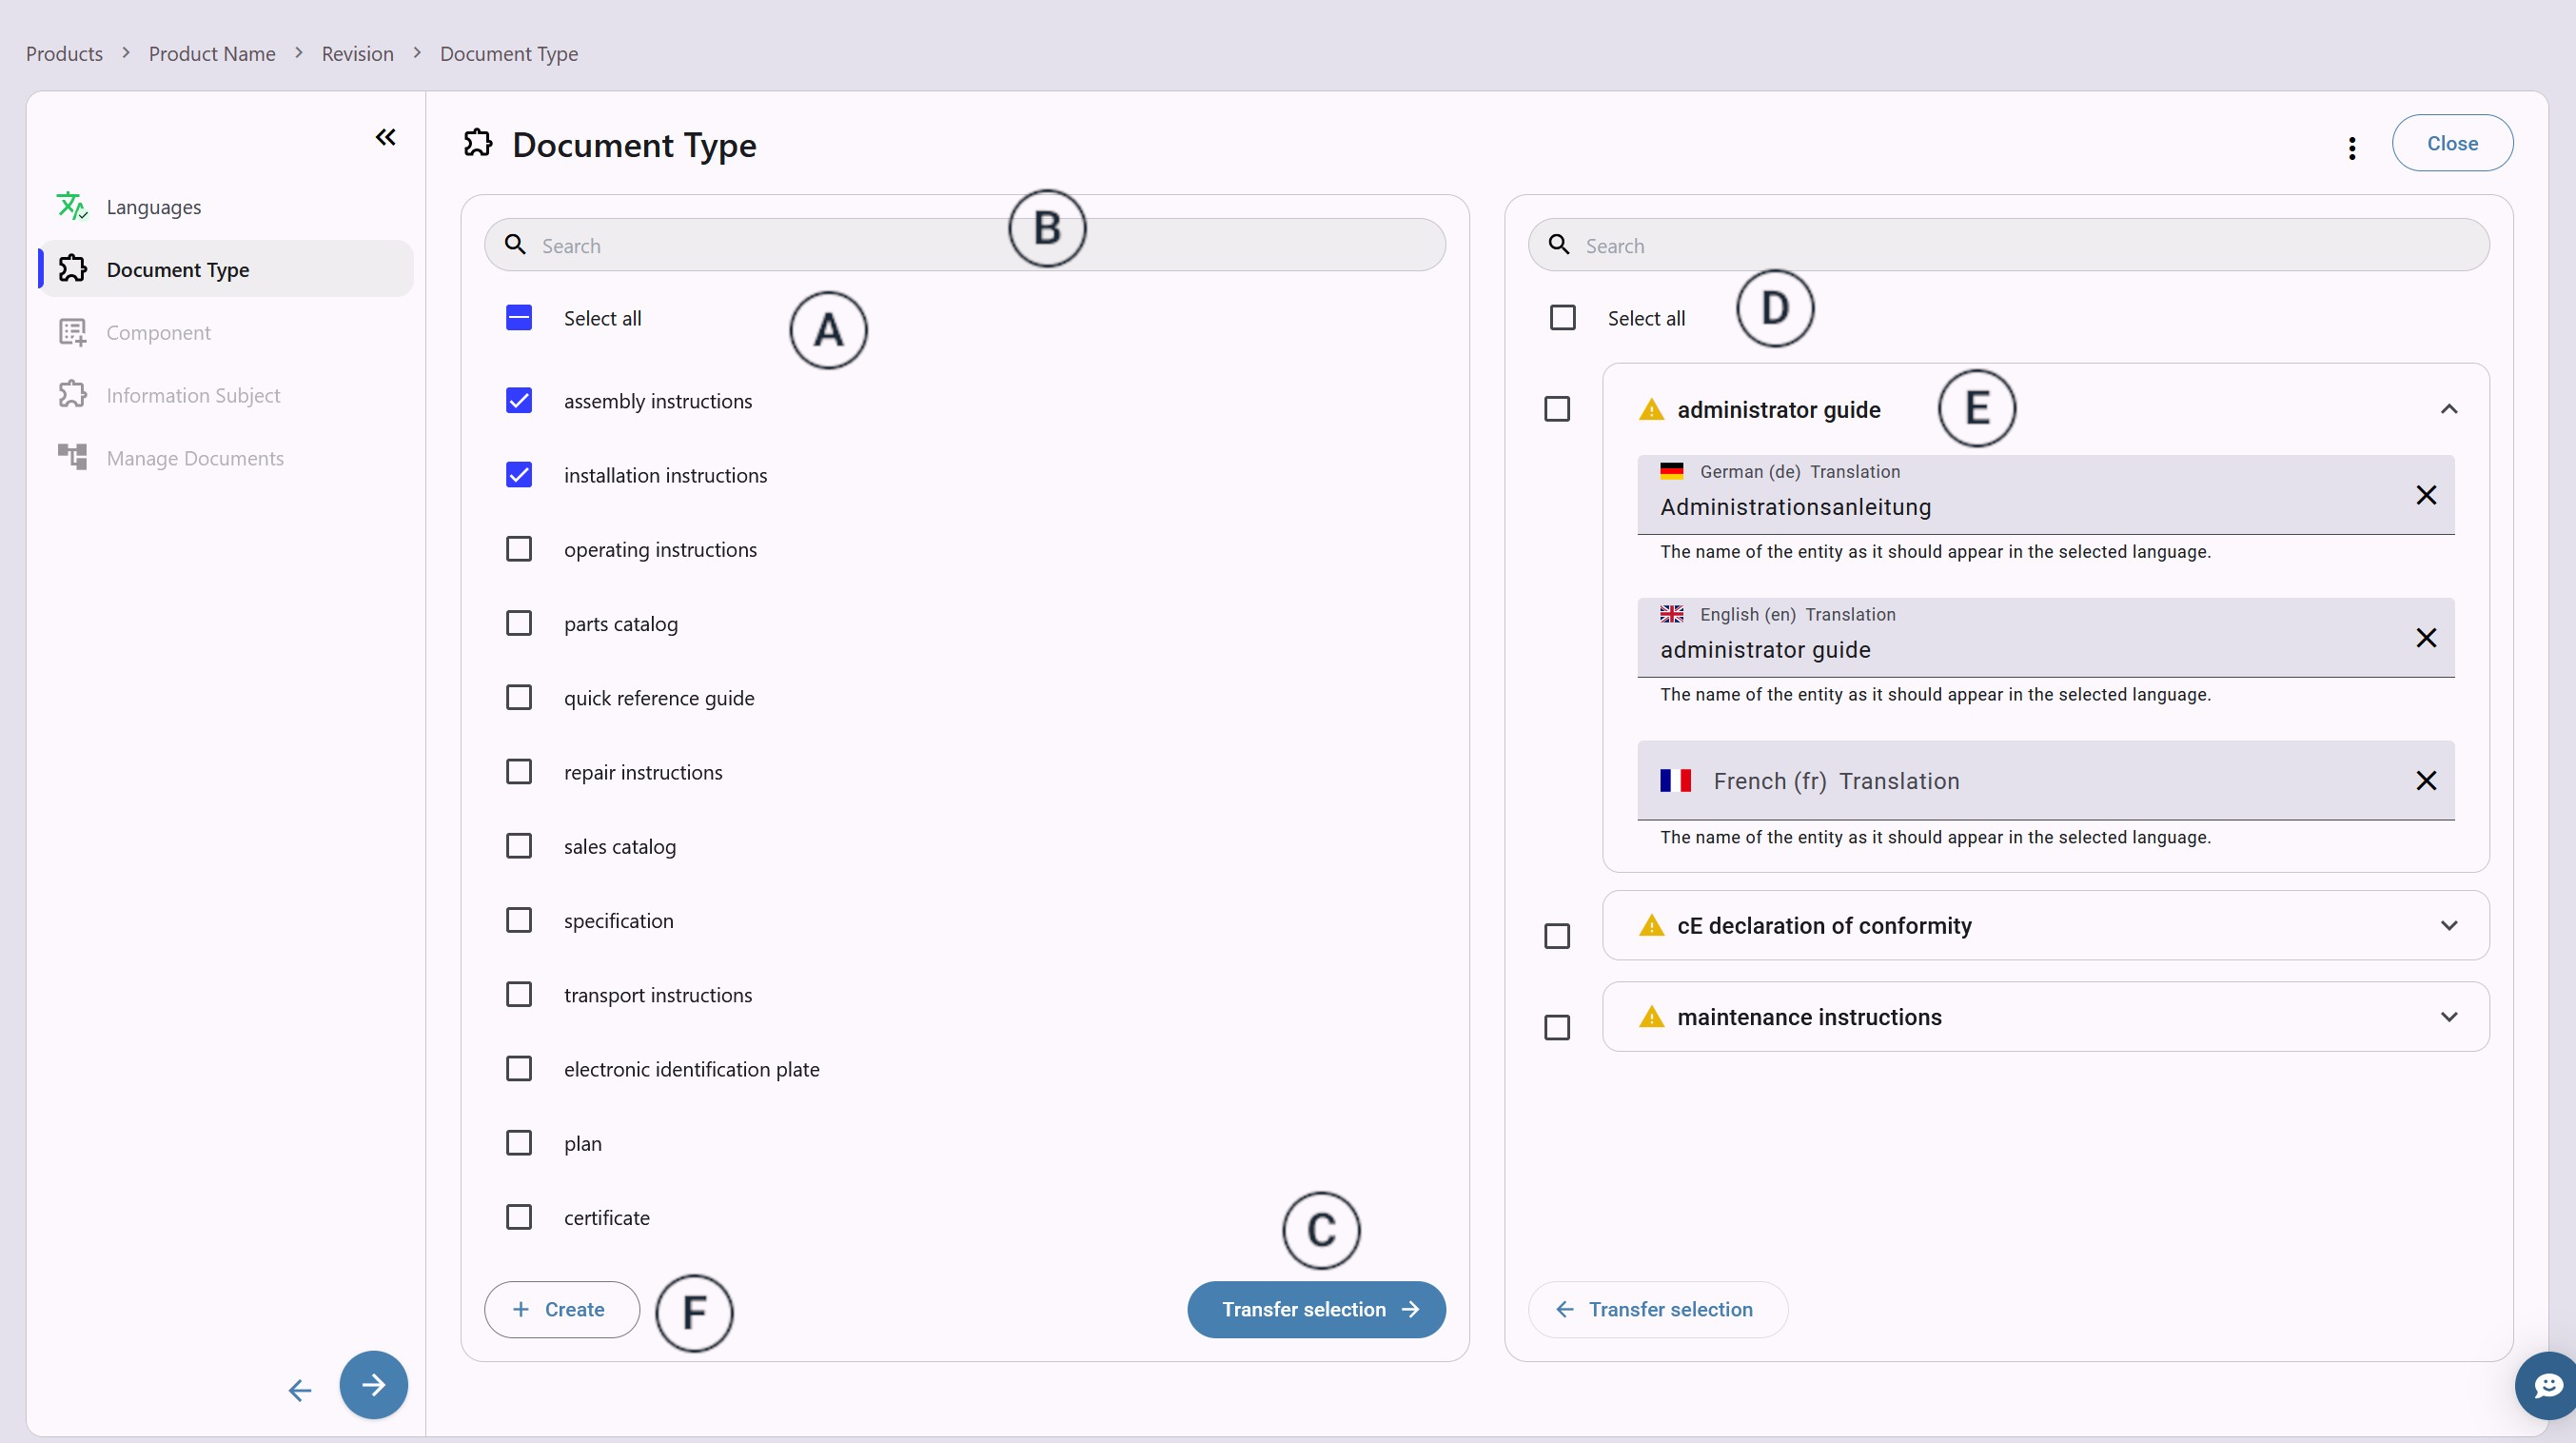
Select Available  DocumentTypes
Roles: Editor, Reviewer, Admin Plans: Starter, Pro, Advanced, Enterprise
About This Task
Determine the available choices for the DocumentType in your revision. Only DocumentTypes that you select during this step will be displayed later in your revision
metadata to streamline the Document creation process. Here, you can also assign publicly visible names to each DocumentType. This enables you to hide terms that are only fit for use within the company from
the operating personnel.
DocumentType states which type of information an Document contains. Typical values for an DocumentTypes are assembly instructions or eC declaration of conformity. An
Document can have multiple DocumentTypes if they apply.
Instructions
DocumentTypes-
 Select all relevant DocumentTypes
for your revision in the list on the left.
Select all relevant DocumentTypes
for your revision in the list on the left. .
.
 Use the search bar
  to search for DocumentTypes.
 -
Click "Transfer Selection"
 to make them available in your revision.
 The selection appears in the list on the
right
The selection appears in the list on the
right  .
. -
Expand DocumentType card
 to manage the public names.
Predefined DocumentTypes have public names already assigned in many languages.
to manage the public names.
Predefined DocumentTypes have public names already assigned in many languages. -
Start creating
custom DocumentTypes or go to step 8 to continue with creating your revision.
You can use both predefined and custom DocumentTypes in your revision.
DocumentType-
Click "+Create"
 .
The DocumentType creation window opens.
.
The DocumentType creation window opens. -
Type a unique name for your DocumentType in the input field. Then click "Create".
The new DocumentType appears in the list on the right .
-
ExpandDocumentType card and add a public name for each language.
If you leave a field empty the DocumentType name is used. Your DocumentType is ready.
-
Repeat the steps 6-7 until you created all custom DocumentTypes you need for your revision.
-
Click
 to proceed to the next step
when your DocumentTypes list is complete.
to proceed to the next step
when your DocumentTypes list is complete.